Category Archives: Multimedia
Storyboarding the ‘Introducing Yourself’ video
- Restrict your video to 2 or 3 minutes. This means you have to get right in there – no time for long intros or titles.
- Ask yourself what you would like to know about other people, for example, their name, their nationality, their current job (who they work for, what they do), where they live, (their house, the town they live in, maybe some more personal stuff maybe about their family or their hobbies and interests. Something quirky that might give an insight into their outlook on life or their value systems or their personality?
- When you have decided what you want to know about other people, use this as a template for designing your own.
- Can you cut down or even eliminate the ‘straight to camera’ monologue? In two minutes every second has to count and add meaning. Apart from the audio, what other content is that ‘webcam-style’ shot adding? Think about symbolism, think about clips of you doing stuff, think about some of the objects you have in your house that can tell a story about you, think about close ups of your hands doing things you enjoy (cooking? playing an instrument? gardening? gaming?)
- Make some bold decisions about whether you are going to use voice over or text and music.
- Play around with some narrative ideas – could you interview some object that was representing ‘you’? Could someone else interview you (and let them pick the questions)? Could you describe you from another perspective (like your pet’s view of you or your child or boss)?
- Here are some introductory videos that other people have made. Have a look and see which you like and try and work out why. Then get storyboarding!
https://www.youtube.com/watch?v=O4-WhS4GOKg https://www.youtube.com/watch?v=9uecbIqMeE4 https://www.youtube.com/watch?v=Vl3087hSPpU
Storyboarding
Everyone hates storyboarding. Fact. Surely it’s better to just get out there whilst the creative juices are flowing, energy levels are high and you are overcome with motivation. Er…no. Because when you come back with hours of video to edit, energy levels will have crashed and as for being motivated to go out tomorrow morning before work and shooting those extra 20 seconds of video you desperately need…it just won’t happen.
Story boarding is not about planning every shot or writing a blockbuster script – storyboarding is about doing just enough planning to make video-making efficient, effective and economical. Efficient – because it saves wasting filming time on stuff you don’t need and hours of editing time looking at clips which literally bring nothing to the story. Effective – because you start with a clear idea of the messages and emotions you want to convey and how these might be represented so you can go out and create or look for the shots not point the camera aimlessly and hope you can grab some pretty bits. Economical – because time is money, because you will clog your computer up with hours of useless mp4 files and because cloud storage costs.
So what is storyboarding?
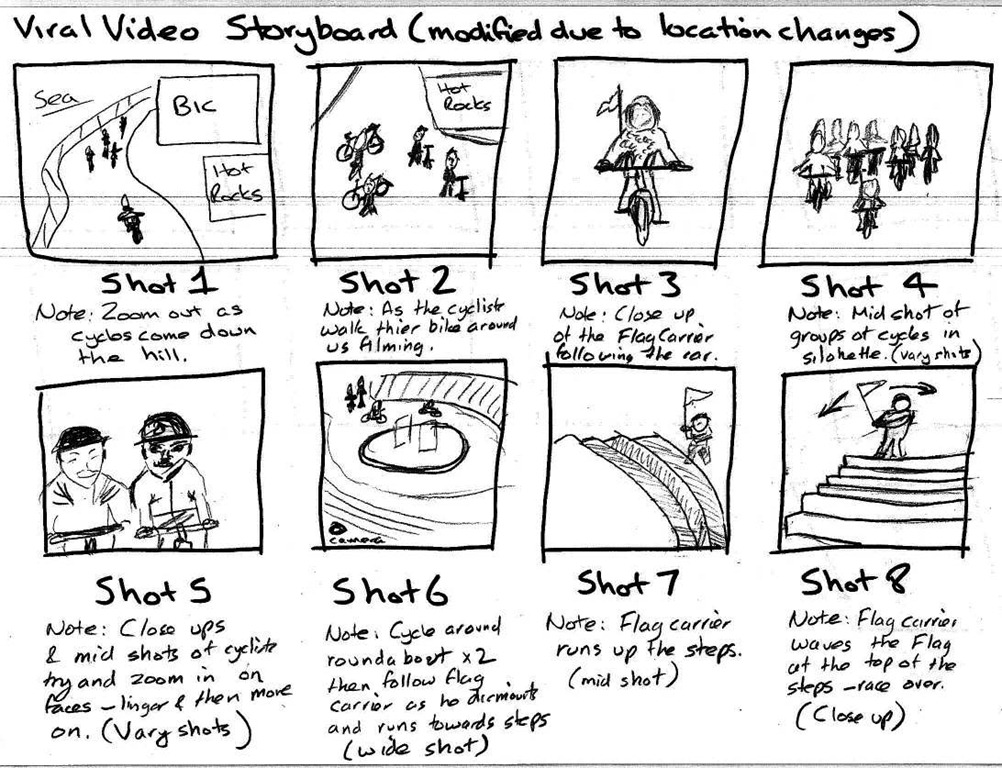
A storyboard is a series of thumbnails that show the breakdown of the video, illustrating the key scenes — how the setting will look, who will be present and what actions will take place. It can be created by hand or using a digital medium. Personally, I find pencil and paper faster and easier to manage but lots of my colleagues are sold on the storyboarding apps. (More on these in a later post).
1. Decide what medium to use for your template.
You can draw a basic storyboard template by hand, simply dividing a posterboard into empty frames of the same size using a pencil and a straightedge. The setup should look similar to that of a comic book, with rows of square cells that show how the scene will look on a screen. If you prefer, you can use Adobe Illustrator, storyboardthat.com, Microsoft PowerPoint, Amazon’s Storyteller, or inDesign to create a storyboard template in vertical or horizontal format.
Tip – the cell sizes should be drawn in the same aspect ratio as the finished video, such as 4:3 for a TV screen or 16:9 for a feature film screen. You can purchase special thumbnail sheets with these dimensions.
A storyboard template for e.g a training video needs to include rectangular frames into which you insert the visuals such as still images, captions etc. Make sure there’s space where you can write in video descriptions. There should also a column for the audio, which is where you include the dialogue and sounds or music.
2. Create a timeline.
Establishing the parameters for when and where your story takes place and deciding in which order the events of the story happen chronologically, is the best way to organise your story so you can begin bringing it to life. If your story isn’t completely linear (e.g. there are flashbacks, flash forwards, shifting perspectives, alternate outcomes, multiple timelines, time travel, and so on), you should still create a narrative timeline.
Make a list of the main events of the story in the order they will be told. This is how they will appear on screen.

3. Identify the key scenes in your story.
A storyboard is meant to give its viewer the gist of how the story will translate to film. The point isn’t to try to recreate the entire experience in a flip book, but to demonstrate important key parts that will draw the viewer in. Think your story through and brainstorm a list of the key moments that you want to illustrate on your storyboard.
- Pick scenes that show the plot developing from start to finish.
- Turning points are important to show. Any time there’s a plot twist or an important change, include it in the storyboard to move the story along.
- You may also want to depict changes in setting. If the story begins in one city and moves to another, make sure that will be clear in your illustrations.
- As a general guideline, keep in mind that for a typical up-to-two-minute video, a storyboard should have max 60 frames. Factor in no less than two seconds per frame on average, and a max of about 7 or 8 seconds.
 4. Decide how detailed to get.
A storyboard can be incredibly detailed, with illustrations depicting every shot. You really don’t need this for a 2 minute video to introduce yourself but if you are in to the preliminary stages of a feature-length film, you might eventually want to break the film down into individual scenes, with a separate storyboard for each one. This allows you to create a very detailed representation of the progression of individual scenes and is helpful when it comes to staying organized during film-making.
If you’re working on a film and breaking it down shot by shot, create what’s called a shot list. For each shot on the list, you’ll need to think about the shot’s composition and other details involving how it will actually be filmed.
Remember that the point of the storyboard is to provide visual clarity and keep everyone on the same page. It’s not supposed to be a work of art in and of itself. Take a practical view when it comes to the level of detail you choose for your storyboard. You don’t want your viewer to get lost in trying to interpret your illustrations instead of seeing the bigger picture.
A good storyboard will be easily understood by anyone viewing it. Potentially, a director, cameraman, scene selector, or even a prop specialist (just to name a few) may refer to the storyboard for reference, guidance and direction. In this case, you are all those rolled into one!
5. Write a description of what each cell will show.
Now that you know what main scenes you want to show, think about how to depict the action in each illustration. Go down your list of scenes and write a description of the most important elements of each one. This will help you determine what exactly to draw for your storyboard. For example, you might want to have a cell that depicts a conversation between two main characters. What needs to be conveyed in this image? Are the characters fighting, smiling, or moving toward a destination? Some sort of action should take place in each drawing.
Take the setting into account as well. Is it important to have a certain view in the background behind the characters?
6. Sketch your thumbnails.
Start bringing the scenes to life by drawing the sketches you mapped out into the template you designed. This is just your rough draft, so don’t try to make it perfect. As you sketch each scene, tinker with the following elements, erasing and redrawing as often as necessary:
- Composition (lighting, foreground/background, color palette, etc.)
- Angle from which the camera is shooting (high or low)
- The type of shot (wide shots, close-ups, over-the-shoulder shots, tracking shots, etc.)
- Props (objects in the frame)
- Actors (people, animals, cartoon talking couch, etc.: anything that can act rather than be acted upon)
- Special effects
7. Add other important information.
Next to or below each cell, fill in your description of what’s happening in the scene. Include dialogue that will take place. Add information about the length of time the shot will take. Finally, number the cells so they’re easy to reference if you need to discuss your storyboard with others.
8. Finalise the storyboard.
- Once you have identified the key points of the subject and worked out a design for each frame, review your work and make final changes. Be sure that each cell portrays the action you want it to portray. Tweak the descriptions and dialogue if necessary. It’s a good idea to have someone else review the storyboard to make sure it flows well and isn’t confusing.
- Consider adding colour. If you’re creating an advertising or training storyboard, this will help your ideas pop.
- Remember that it’s not necessarily important that the drawings look realistic or perfect – simple stick figures are fine. In most cases, storyboards don’t need to be perfect, they only need to make sense to you and your team.
9. Handy hints
- Think in three-point perspective. While your storyboard illustrations don’t need to look like they were created by a professional artist, there are a few artists’ tricks you can use to make your images look more like movie scenes. This isn’t mandatory, but it can help the people you’re working with visualize the shot more clearly. Instead of drawing all of your characters as though they were standing on the same horizontal line, put them in perspective. Have some standing a little further from the camera and some standing closer. The ones standing further from the camera should appear smaller, with their feet higher up on the page, and the ones standing closer should appear larger, with their feet lower on the page. When it’s time to translate the storyboard to film, you’ll have a much better idea of how to direct the shot.
- Have motivations for your cuts. As you storyboard your film, think about your reasons for making each cut to a new shot. Advancing the story is about more than just hopping to the next plot point; you need to give a reason for why your characters do what they do. Storyboarding the motivations for your cuts will help you figure out how to build tension and keep the story moving when it comes to making the film. For example, if you want to cut from one room to another, have a character in the first room look toward the door because they hear a noise. This helps the story’s continuity and keeps the viewer engaged.
- Let your storyboard morph as you go. Your storyboard can be an extraordinary tool to have at your disposal when you’re setting up your shots and directing your film. However, relying heavily on your storyboard might end up being too confining. As you make your film, you’re bound to come across ideas for shots you didn’t think of before. Allow yourself to drift from the board, or at least revise it, so that the filmmaking process is a bit more organic.
- Remember to accept others’ input as you go along, especially if you’re working with a crew. A storyboard is meant to be edited and changed, can can often be improved by ideas you might not have thought up on your own.
- Most film makers have a different style when it comes to storyboarding. Some map out every last detail, while others use it as a loose guide. You decide what works for you.
Instant Video Apps
This Mooc is designed to help you plan, shoot, edit and share your own videos using either iMovie (if you have a Mac) or Movie Maker (if you use windows). Both these programs are sophisticated packages that are suitable for everyone from beginners right through to professional film makers. However, they take a while to get the hang of – hence this MOOC!
However, some of you might want something right now – either because you feel you don’t have time to join the MOOC, or you just want to get going with the minimum of fuss or just that making videos is something you need to be able to do but with no aspirations to be Steven Spielberg.
The good news is there are loads of instant apps out there that are available on line or downloadable for your mobile device. Most of them are free in the online versions, at least at entry level. The downloadable ones are a few Euros.
Basically you select a theme from a given range, drag and drop your MP4 video clips into it, add some still images if you like, type a bit of text into a template and choose some background music from a menu. Then save it and send all your friends the url link. Simple.
The downside is that you are often restricted to length – both of the finished video and also the length of each video clip, the selection of music can be pretty awful and the themes are a bit obvious. The other problem is that it works best for video clips with no audio track – great for those phone camera vids of your breathtaking holiday landscapes – but not so good if your vid is recording conversation because it will be competing with the music track (often compulsory).
Basically, all these apps do what they say on the packet – produce instant and acceptable results with little expertise needed on your part. You have little or no opportunity to edit or customise your video but this has its merits if time is short.
These are some of the ones we have used and found bomb-proof:
Animoto: Our all-time favourite! Has improved hugely since the early days of supermarket musak back tracks so if you haven’t used it for a while, give it another go.
Stupeflix: Love it – totally idiot proof, great tutorial – takes 2 minutes to get going
Videolicious: Drove me stupid but my best nerdy friend loved it. Designed for a mobile and I think my lack of dexterity on tablet touch screen was seriously limiting factor!
Smilebox: Probably the most restrictive of all but the easiest! It’s origins as a twee greeting card app are still a bit visible but at least you have the choice of no music.
There are lots more but these are the easiest we have found – and if you are just looking for a more-than-acceptable result with minimal fuss, you’ll love them. In fact, as the first assignment for the MOOC is to make a max 2 min video introducing yourself, why not give them a go!